Amp Reopens BYOK After a Year: Connecting and Configuring AIHubMix
Amp has reopened BYOK (Bring Your Own Key), and AIHubMix now supports it. This guide uses Anthropic's Claude models as the example and walks through pointing Amp at the AIHubMix API via Custom URL and Model Routing — covering the API key, model name mapping, and project setup.
If you're searching for "Amp BYOK setup", "connect Amp to AIHubMix", "AIHubMix API key", "Amp Custom URL", or "Amp Model Routing", the steps below cover it.
What is Amp good for?
- Multi-model workflows: assign different models to different modes and agents — Claude, GPT, or a fast model for lightweight work.
- Whole-project context: Amp reads across the codebase, edits files, runs commands, and executes tests.
- BYOK and custom routing: pick your own models and providers through Model Routing, Custom URL, and third-party API services.
- Web and CLI together: configure models in the browser, then keep working from the terminal.
- Built for teams: share any thread and work through it alongside your teammates.
- Cloud-synced threads: every thread syncs to the cloud automatically, so your team always picks up from the same state.
The rest of this guide uses Anthropic's Claude models to show how to connect AIHubMix to Amp.
Why route Amp through AIHubMix? One key and one Base URL reach 400+ models across providers, the endpoint is Anthropic Messages API–compatible (so Amp talks to it natively), and per-key model name mapping plus error fallbacks let you adapt to whatever naming a client expects. Create an account →
Part 1 — Connect the API
Step 1: Open Personal Settings
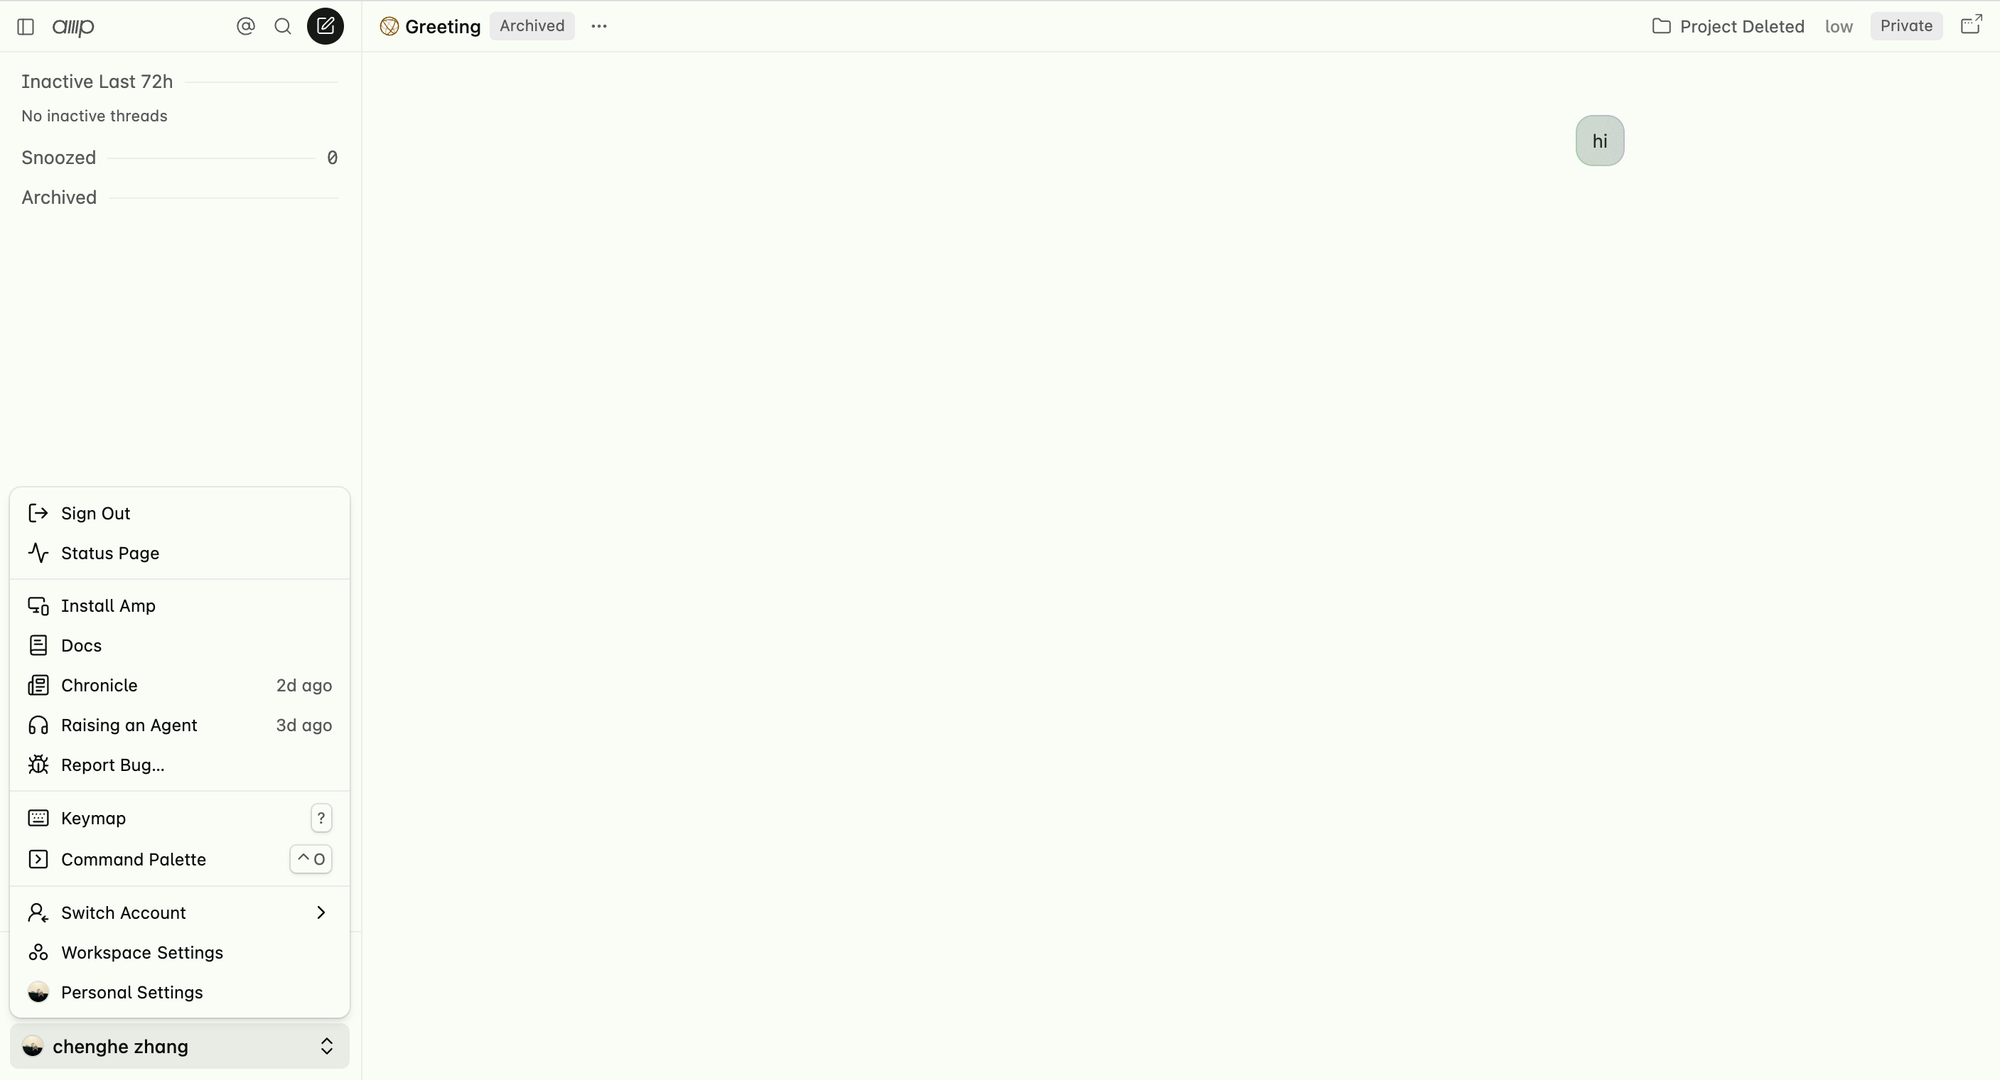
From the Amp home screen, click Personal Settings in the bottom-left corner.
Step 2: Add a custom model route
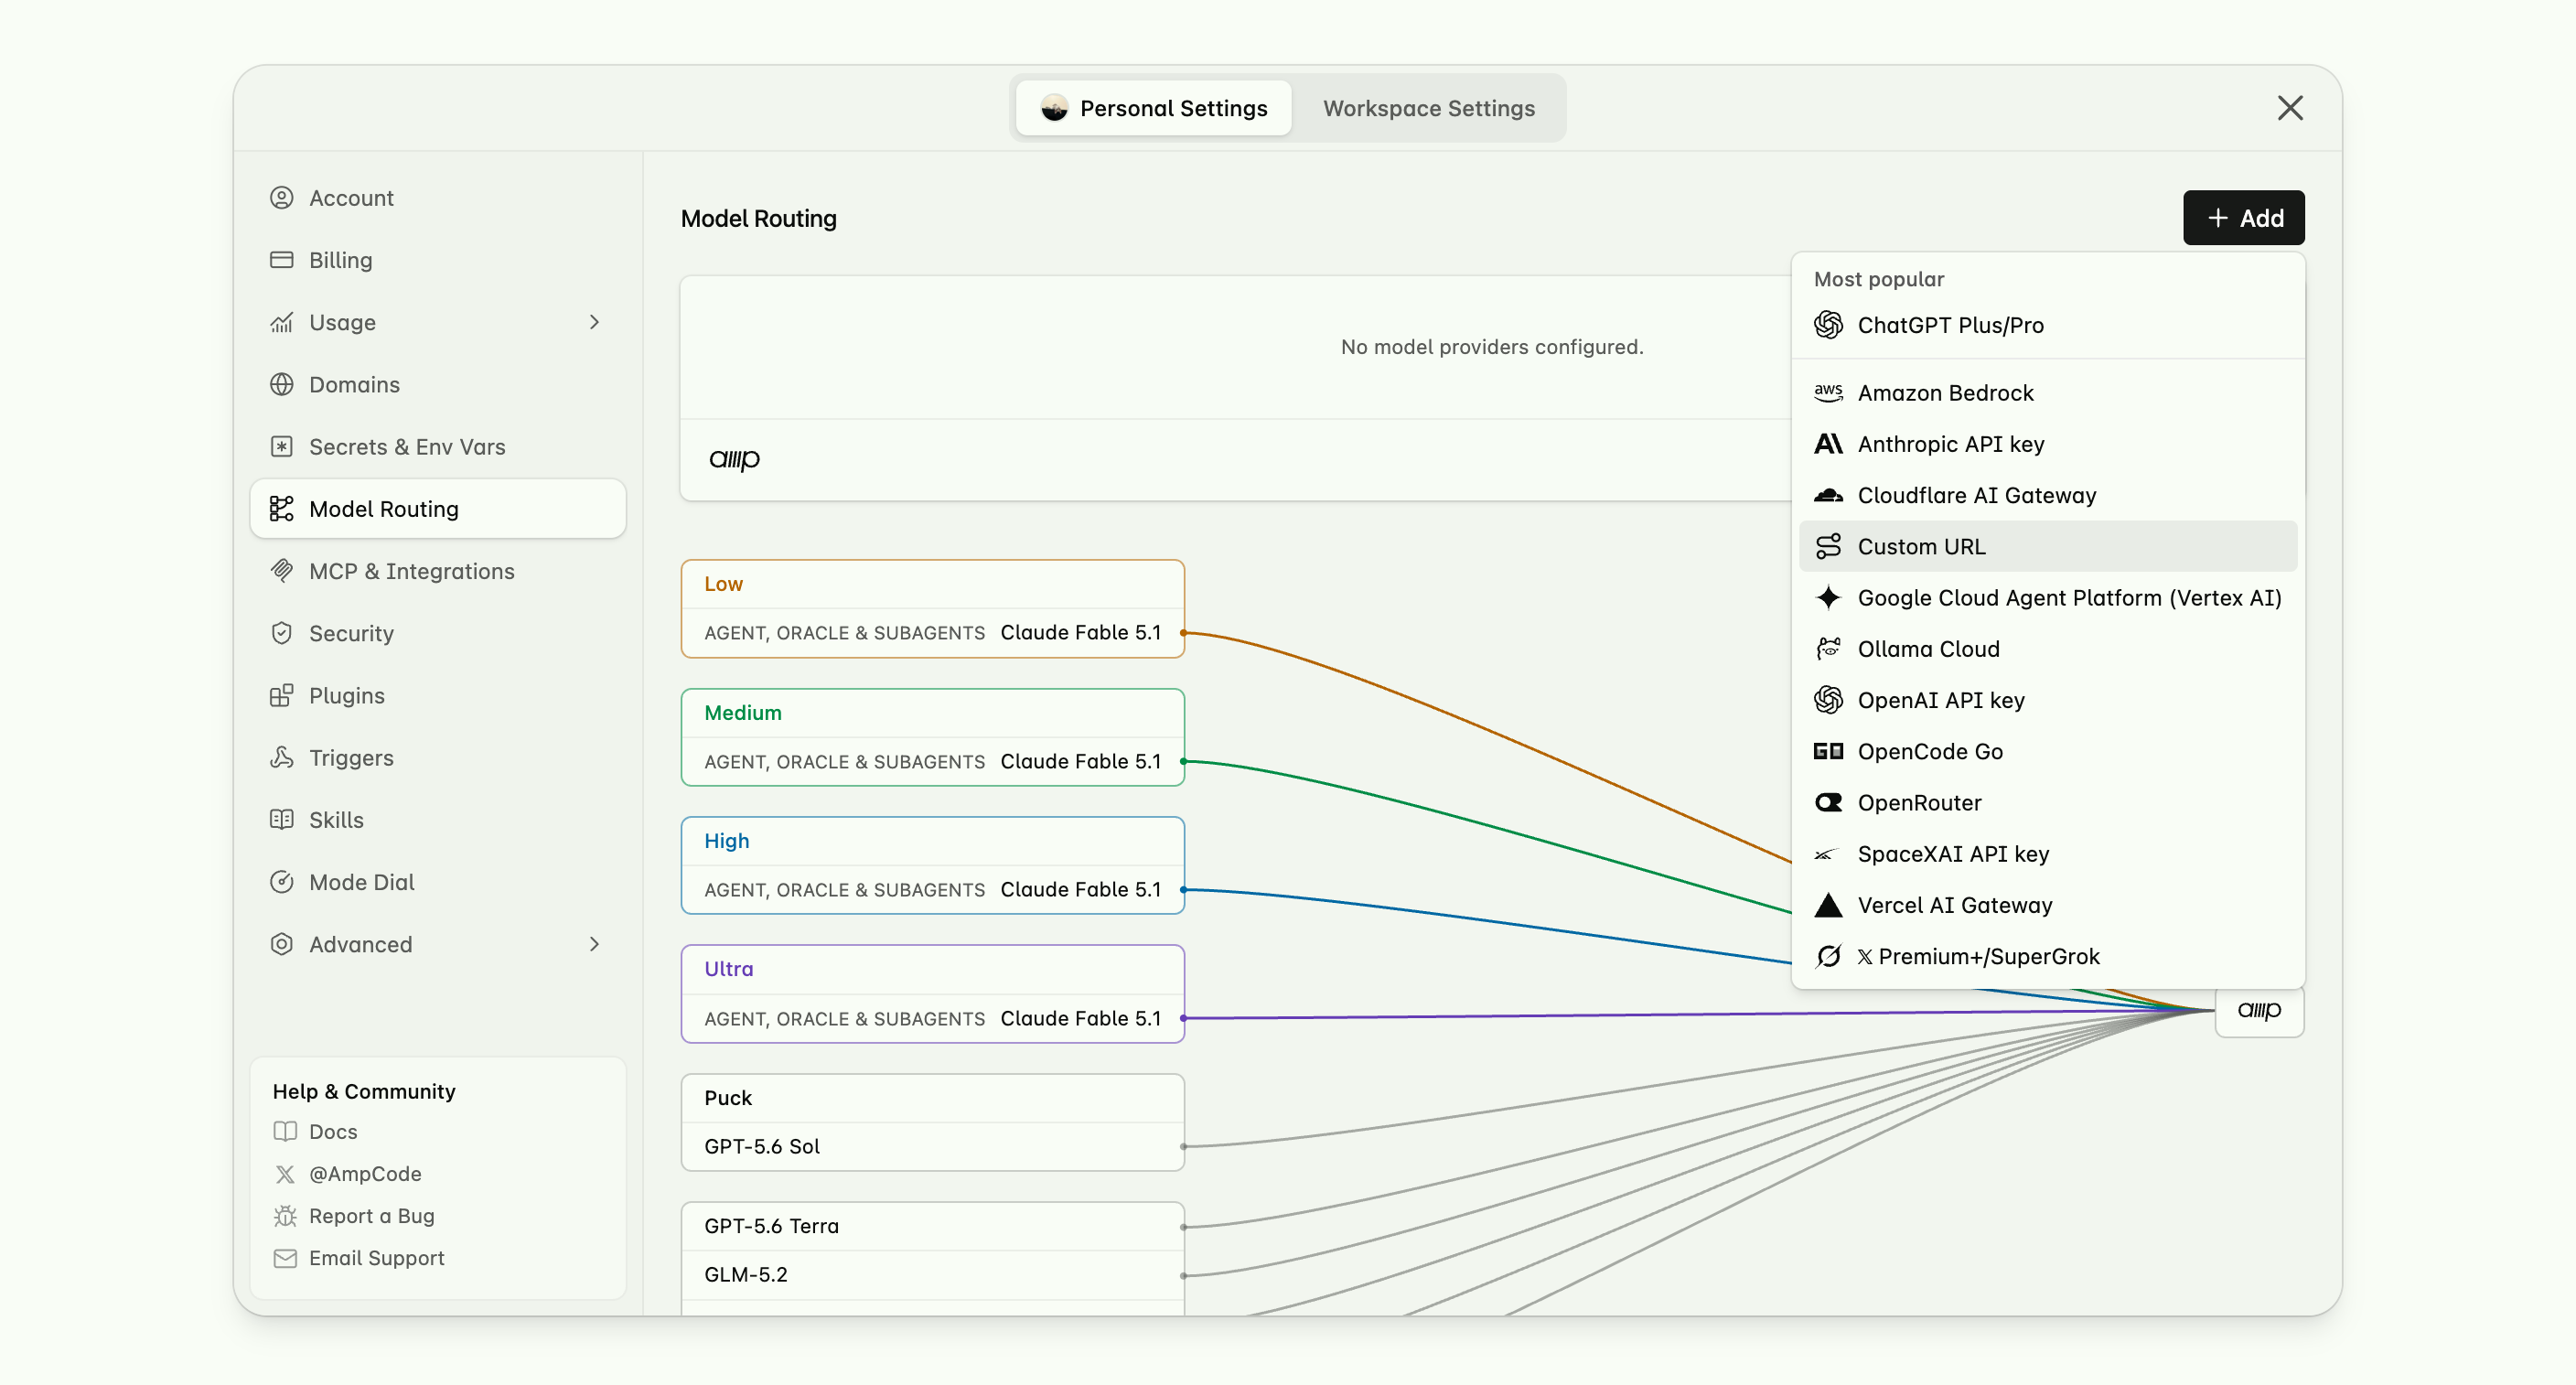
Find Model Routing in the left sidebar, click Add on the right, and choose Custom URL.
Step 3: Create an API key and set up model name mapping
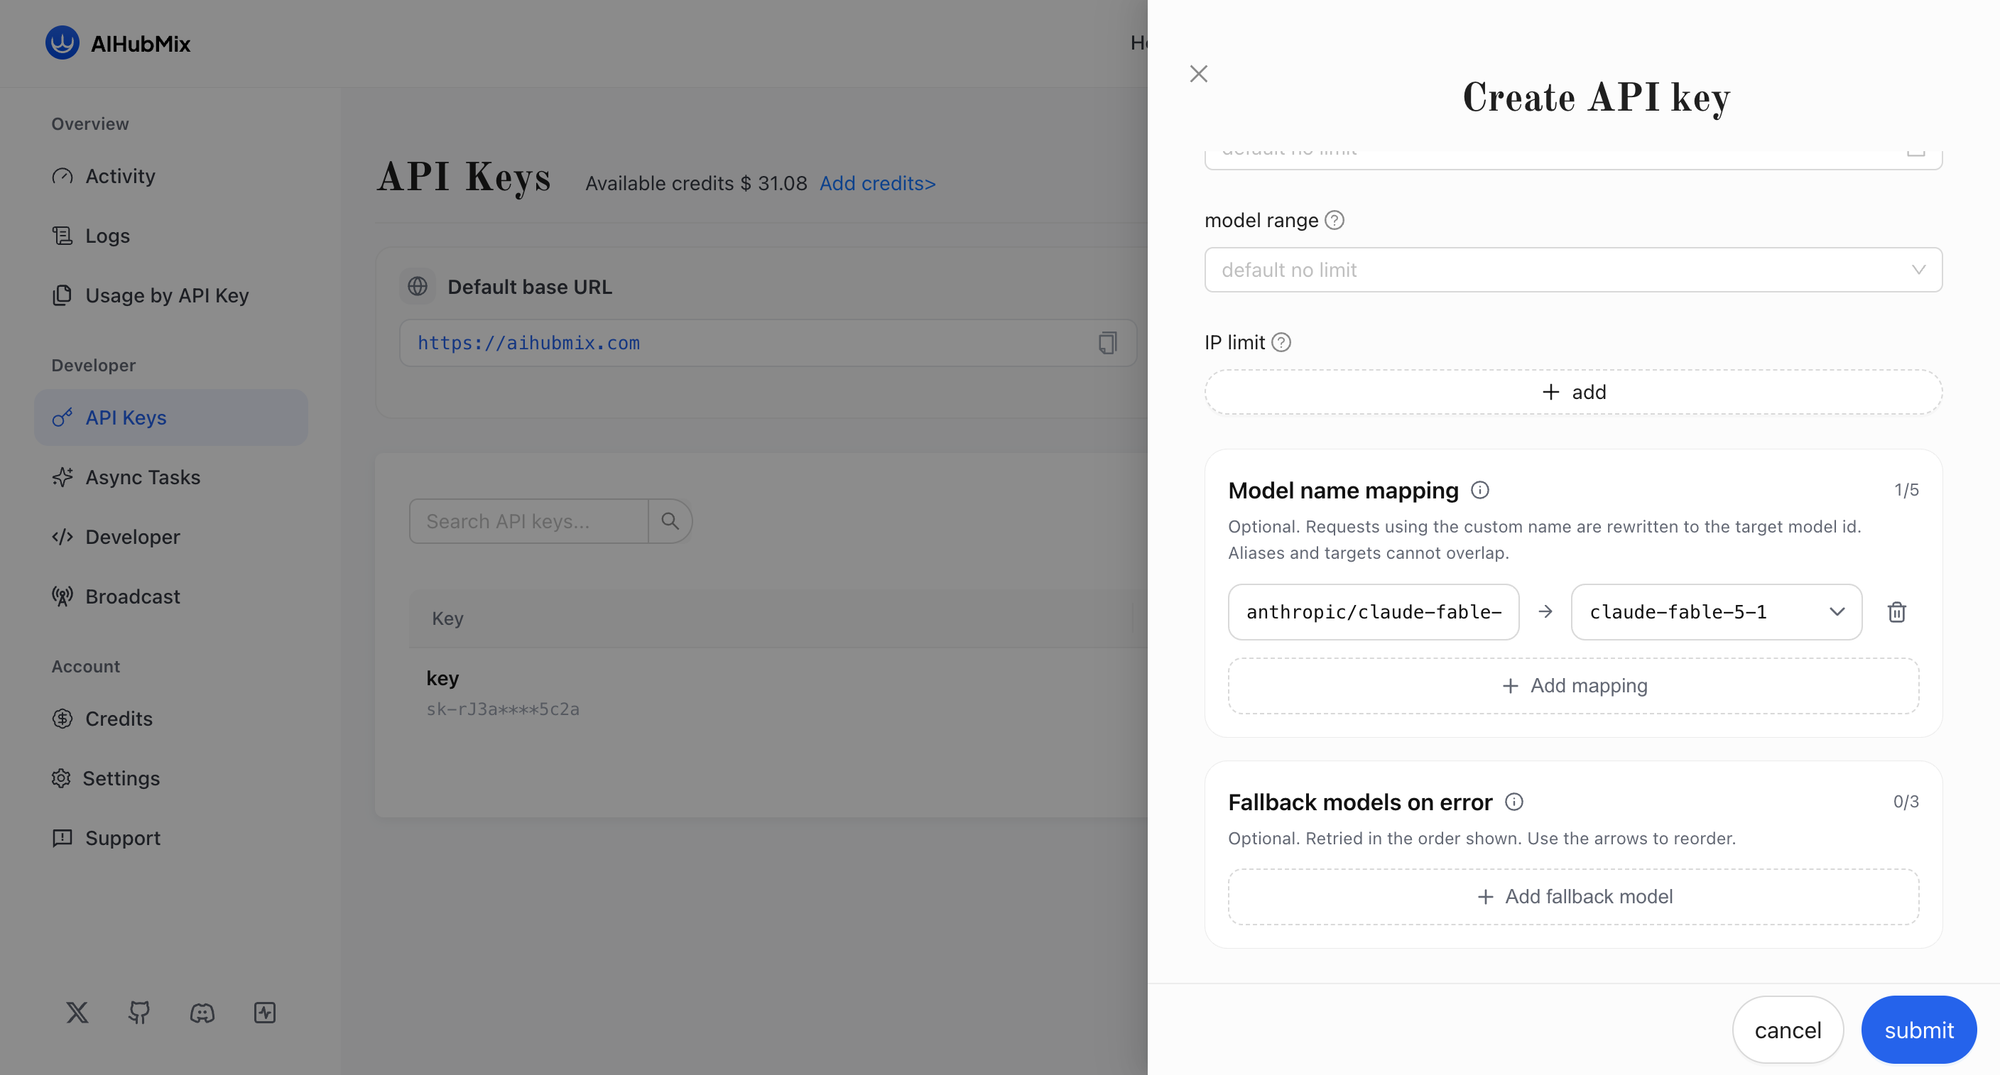
Head to the AIHubMix console and create an API key, then configure a model name mapping on it.
Amp expects model names in provider/model form — for example anthropic/claude-fable-5-1. AIHubMix model IDs carry no provider/ prefix, so add a mapping that rewrites the name Amp sends to the model ID AIHubMix serves:
| Alias (what Amp sends) | Target (AIHubMix model ID) |
|---|---|
anthropic/claude-fable-5-1 | claude-fable-5-1 |
Requests using the alias are rewritten to the target model ID. Each key supports up to 5 mappings, and you can optionally add fallback models that are retried, in order, when a request errors.
Step 4: Fill in the connection details
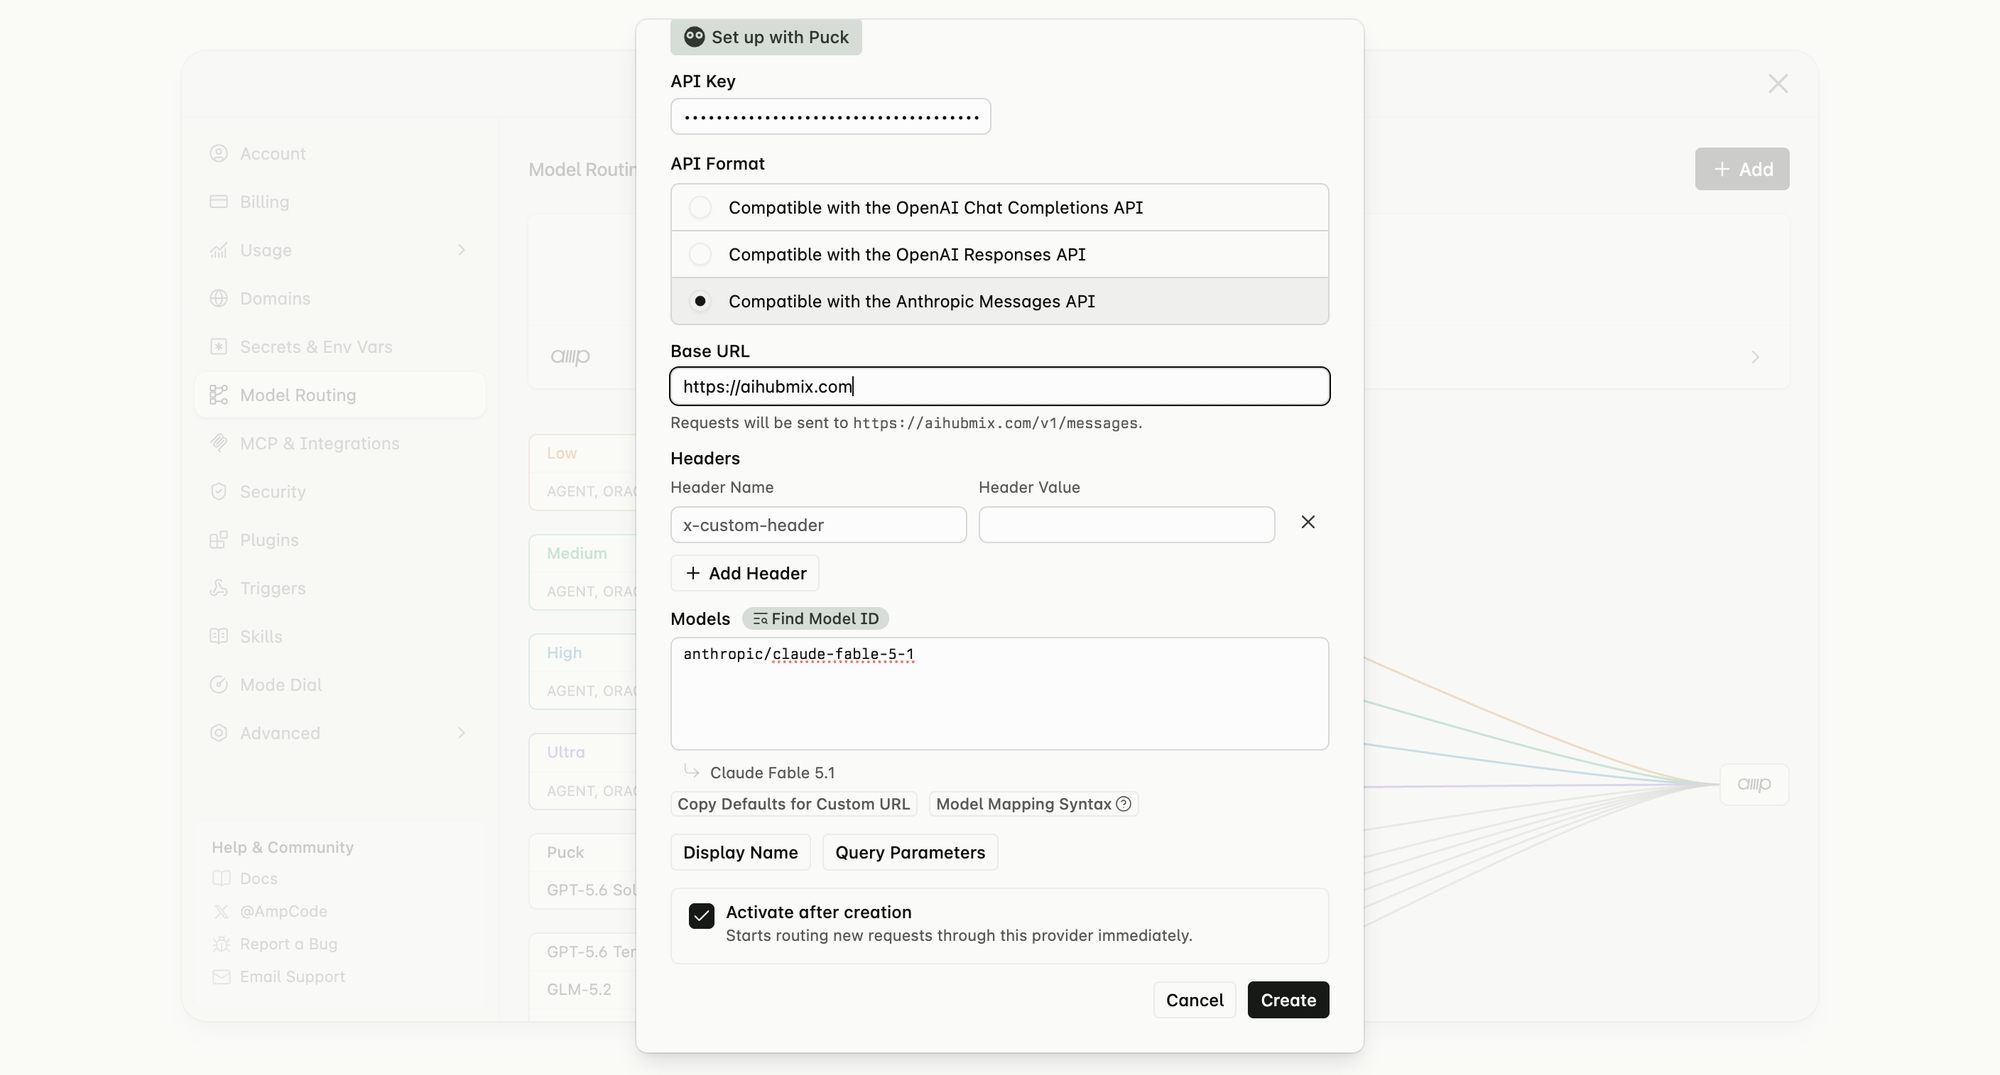
Back on Amp's Custom URL screen, fill in the fields:
- API Key: the key you just created in AIHubMix.
- API Format: select Compatible with the Anthropic Messages API.
- Base URL:
https://aihubmix.com— Amp confirms below the field that requests go tohttps://aihubmix.com/v1/messages. - Models: list the aliases you mapped, one per line (e.g.
anthropic/claude-fable-5-1). Amp resolves each one and shows its display name underneath.
Leave Activate after creation checked so new requests start routing through the provider immediately, then click Create.
Step 5: Verify the connection
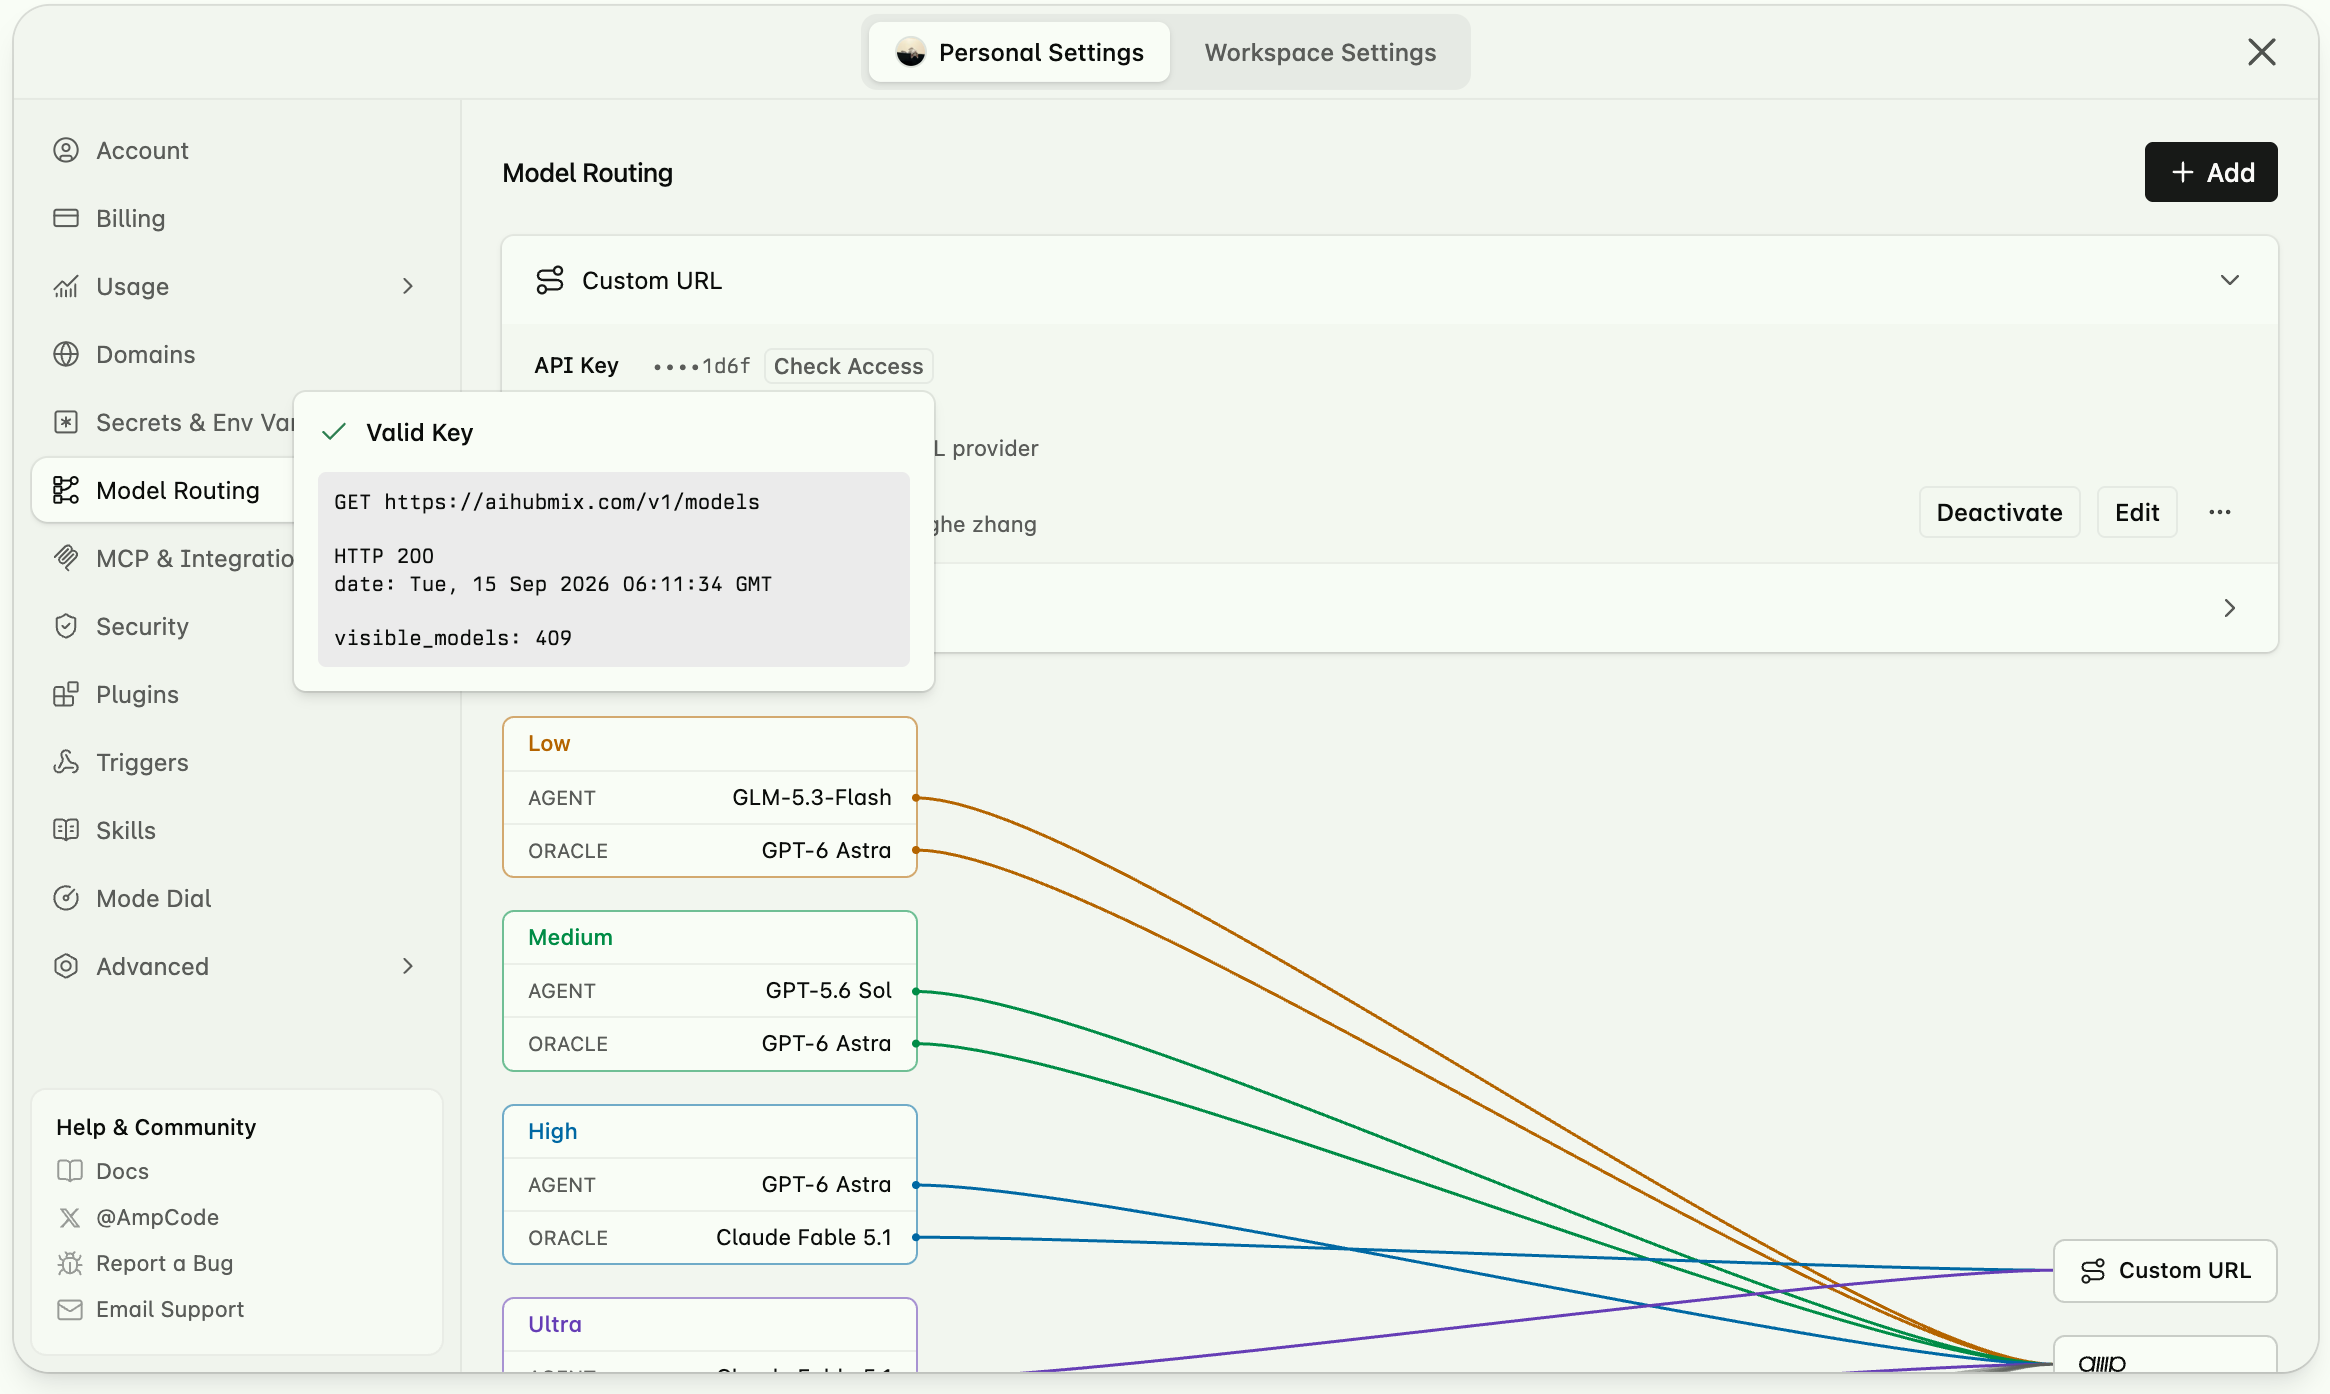
Once saved, the Model Routing page lists your new Custom URL. Click Check Access to test the connection.
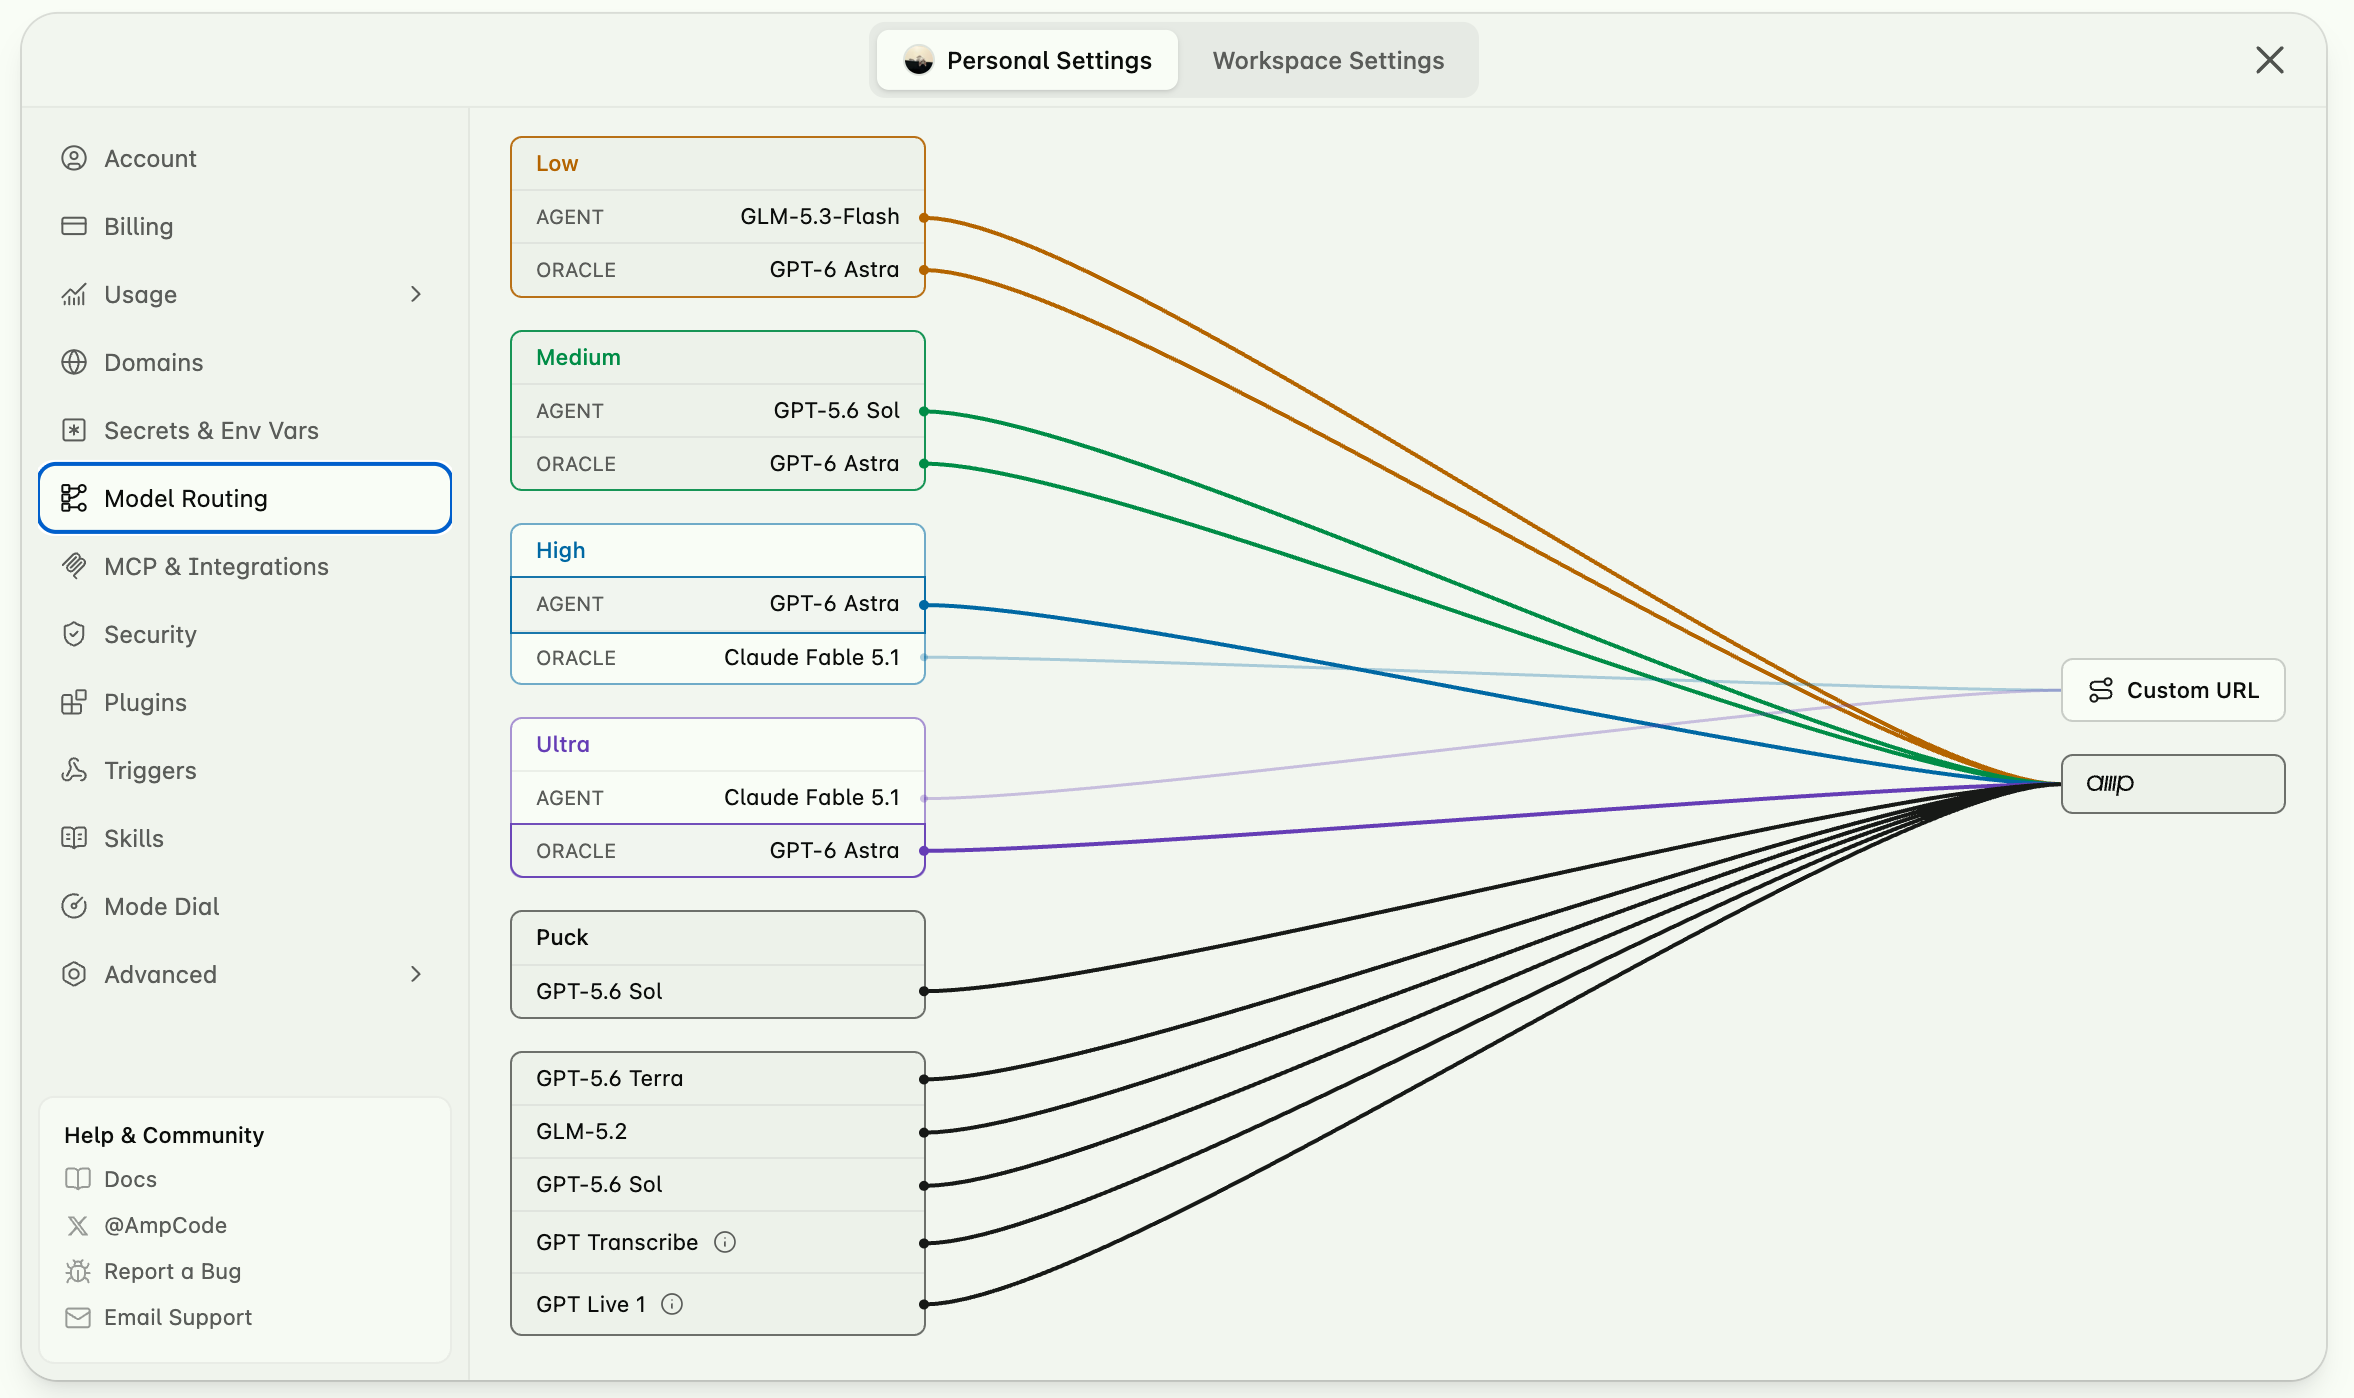
A working key returns Valid Key along with the GET https://aihubmix.com/v1/models probe, an HTTP 200 response, and a count of visible models. The model list below then shows everything this Custom URL can reach.
Part 2 — Create a project and a thread
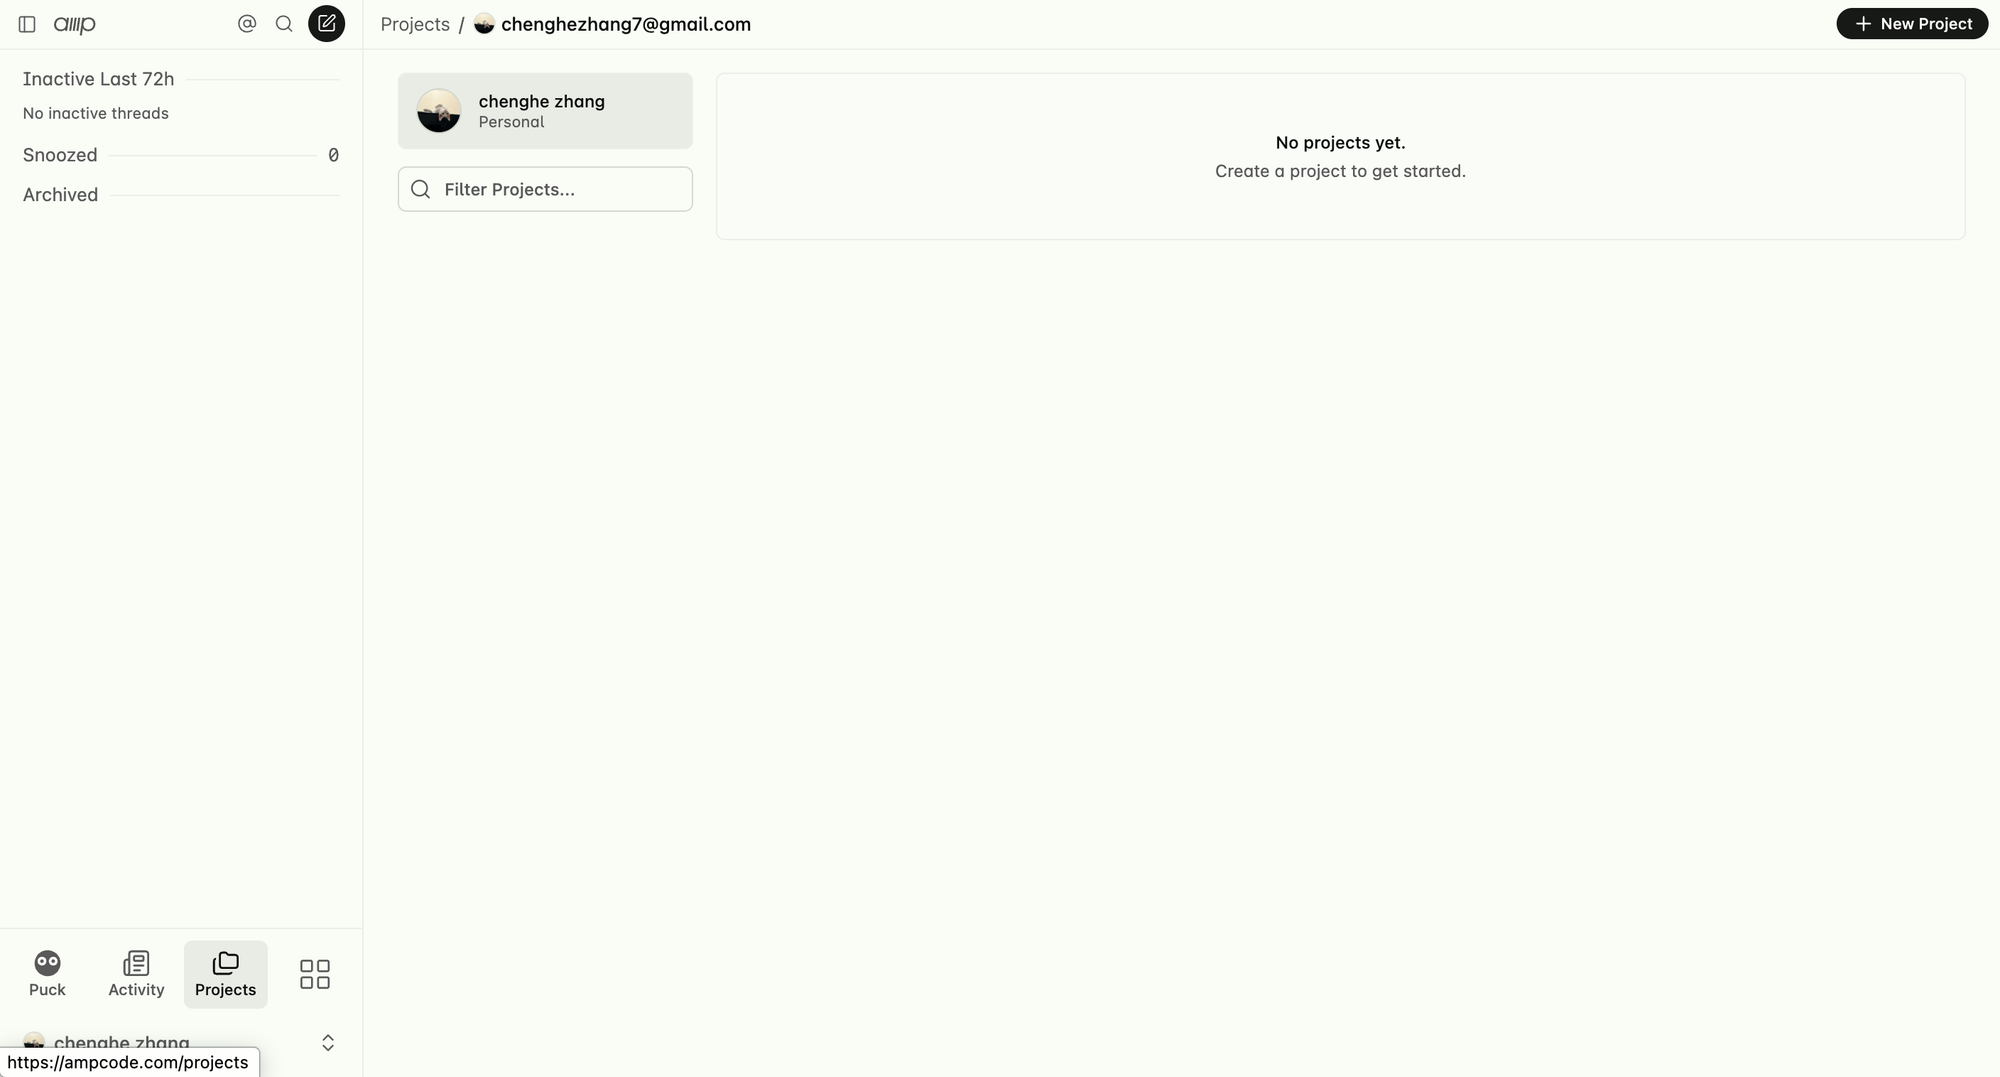
Step 6: Create a project
Click the projects entry in the bottom-left corner, then the new-project button in the top right.
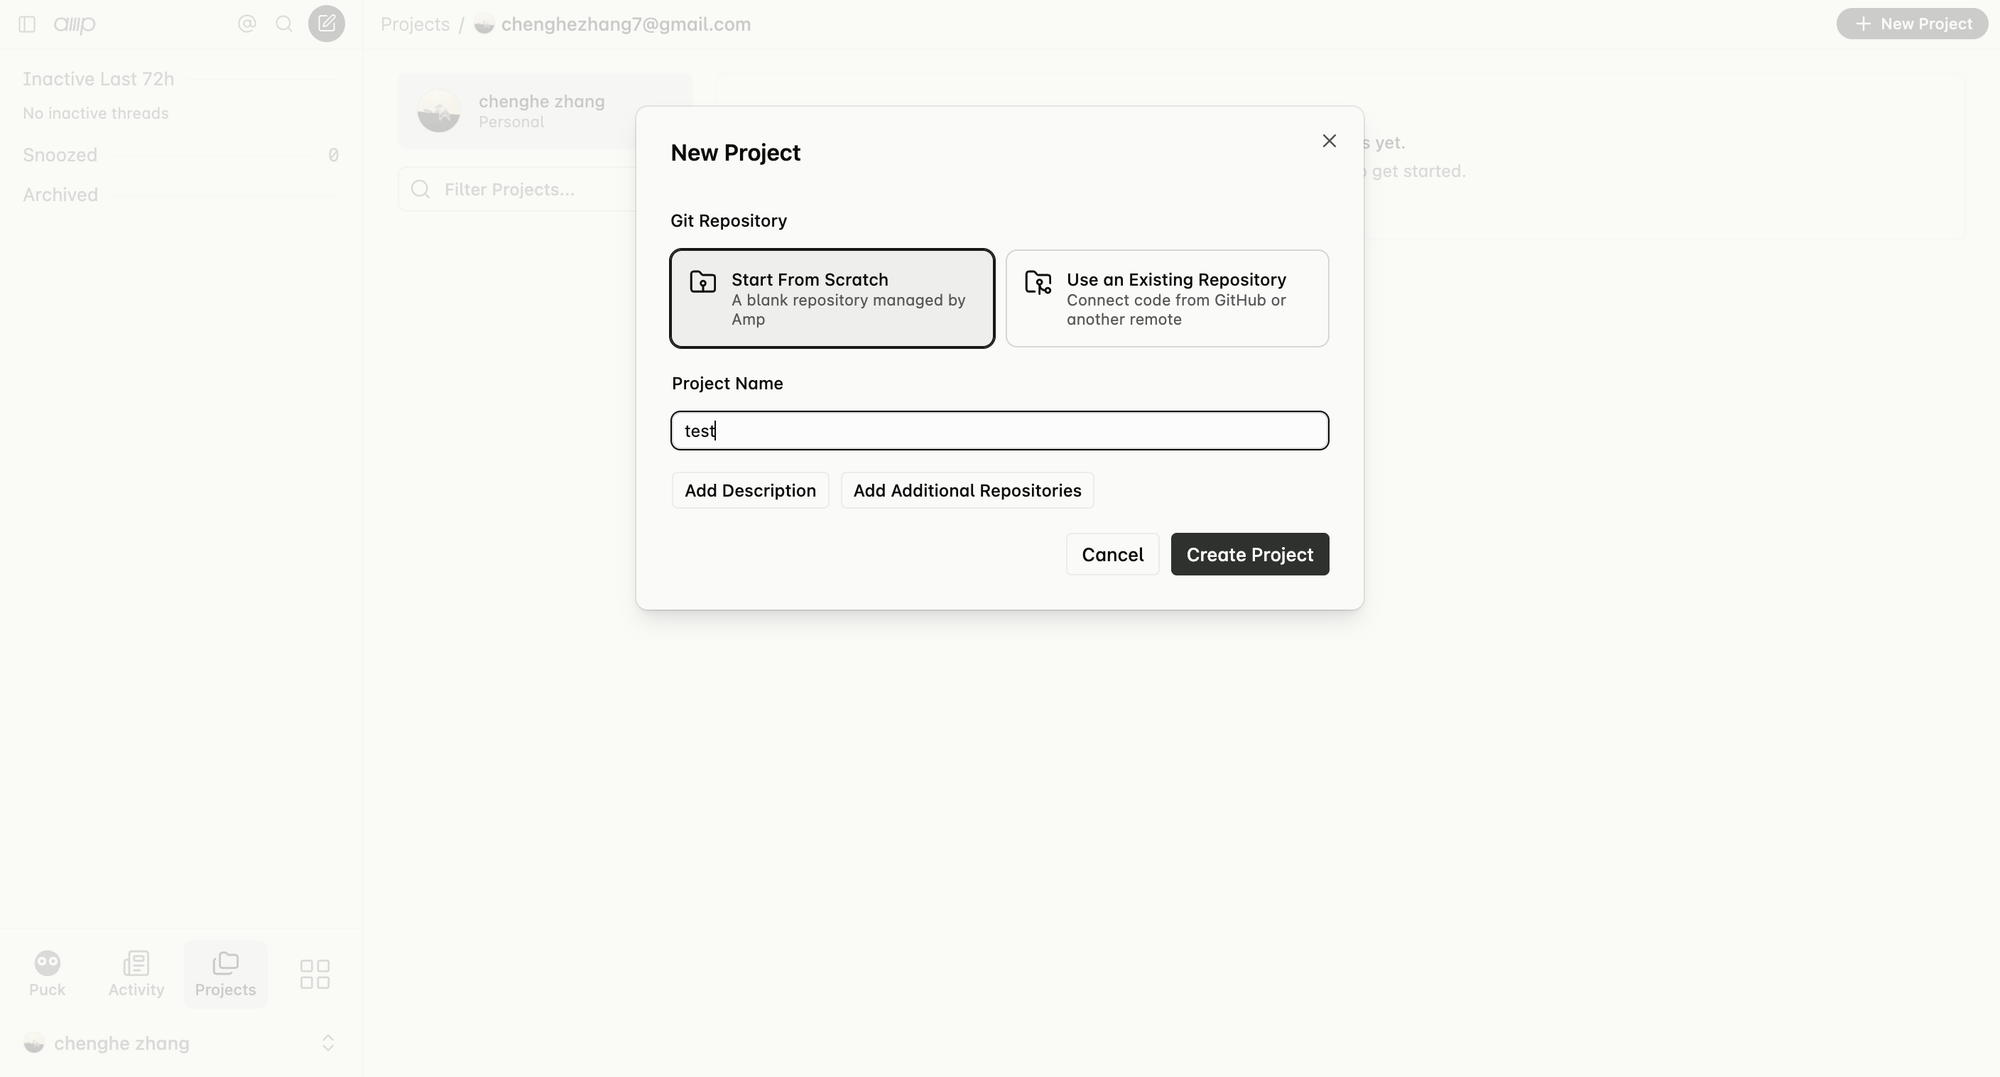
Choose Start from scratch, enter a project name, and finish creating the project.
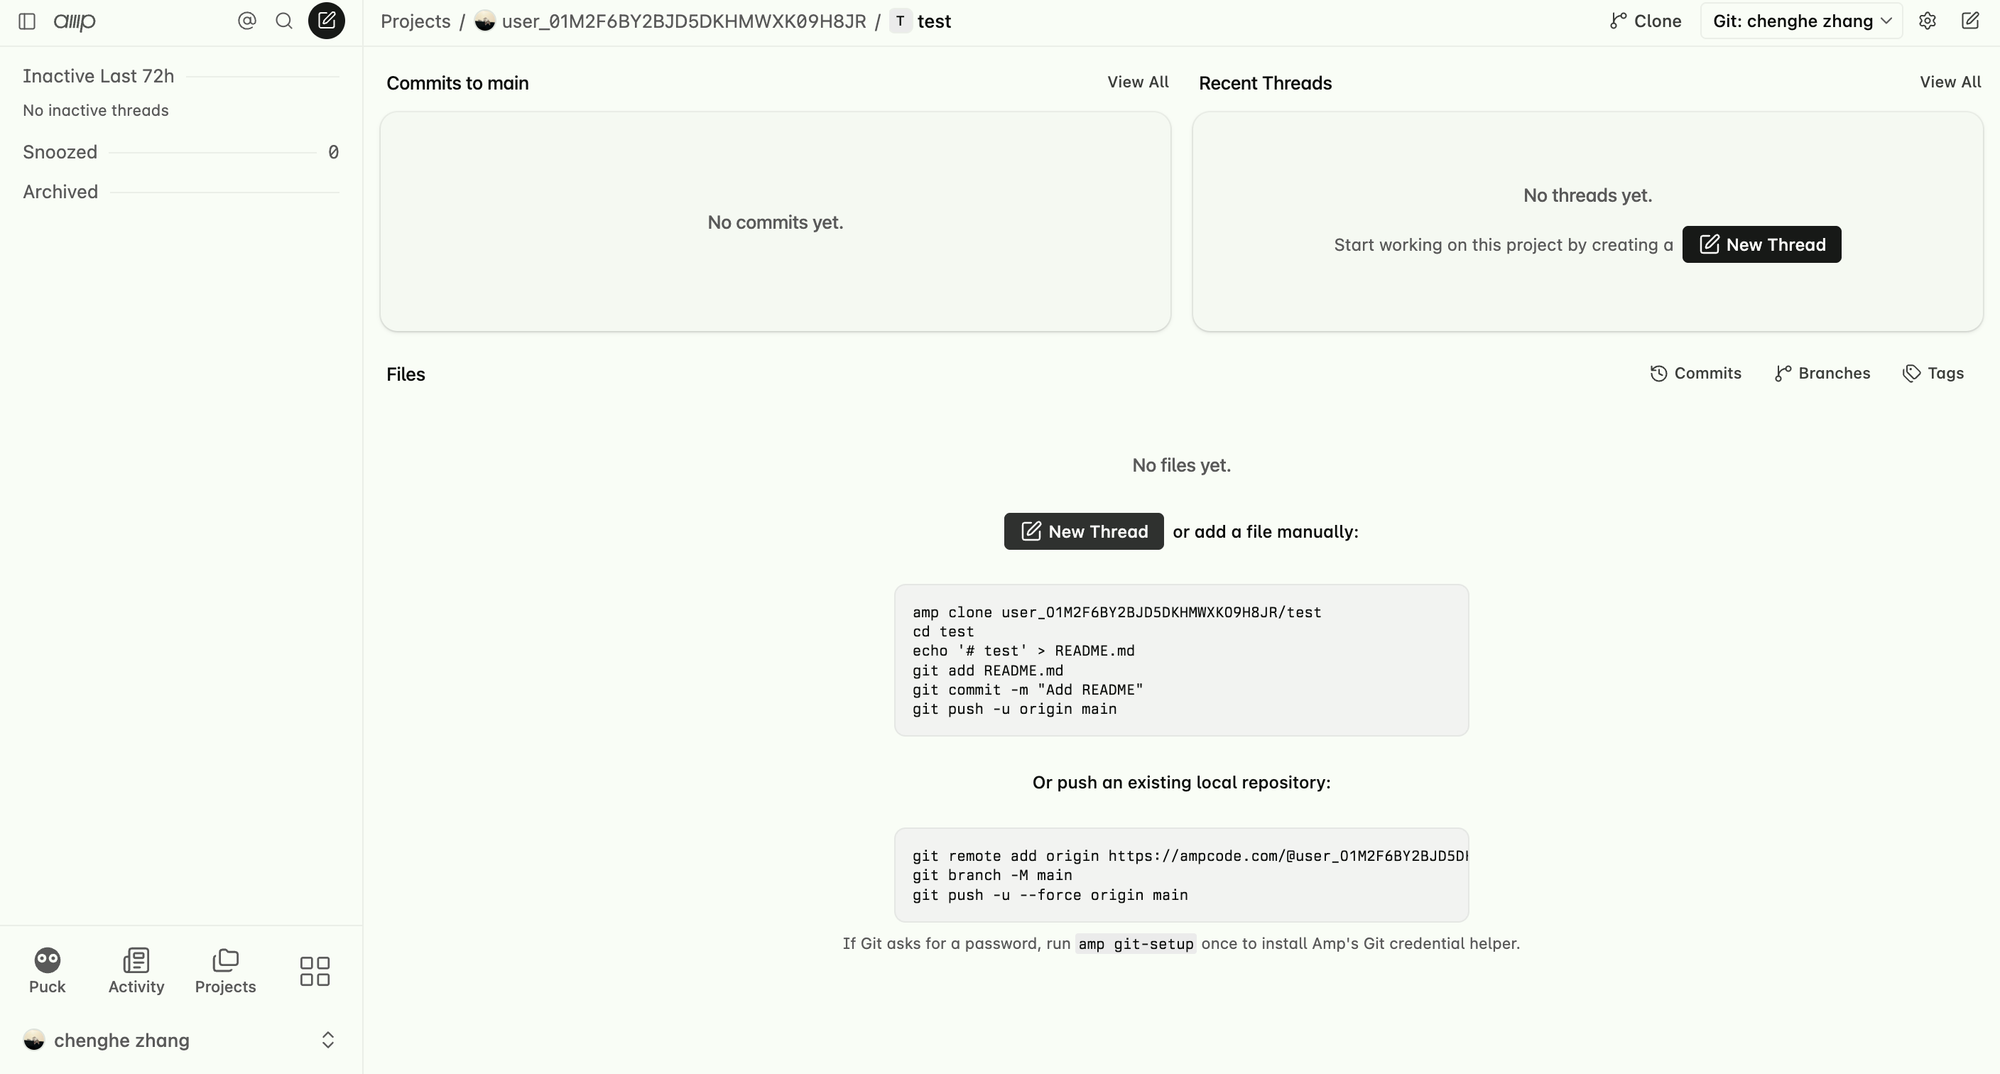
Step 7: Create a thread
Inside the project, click New Thread to start a task.
Part 3 — Assign models and start working
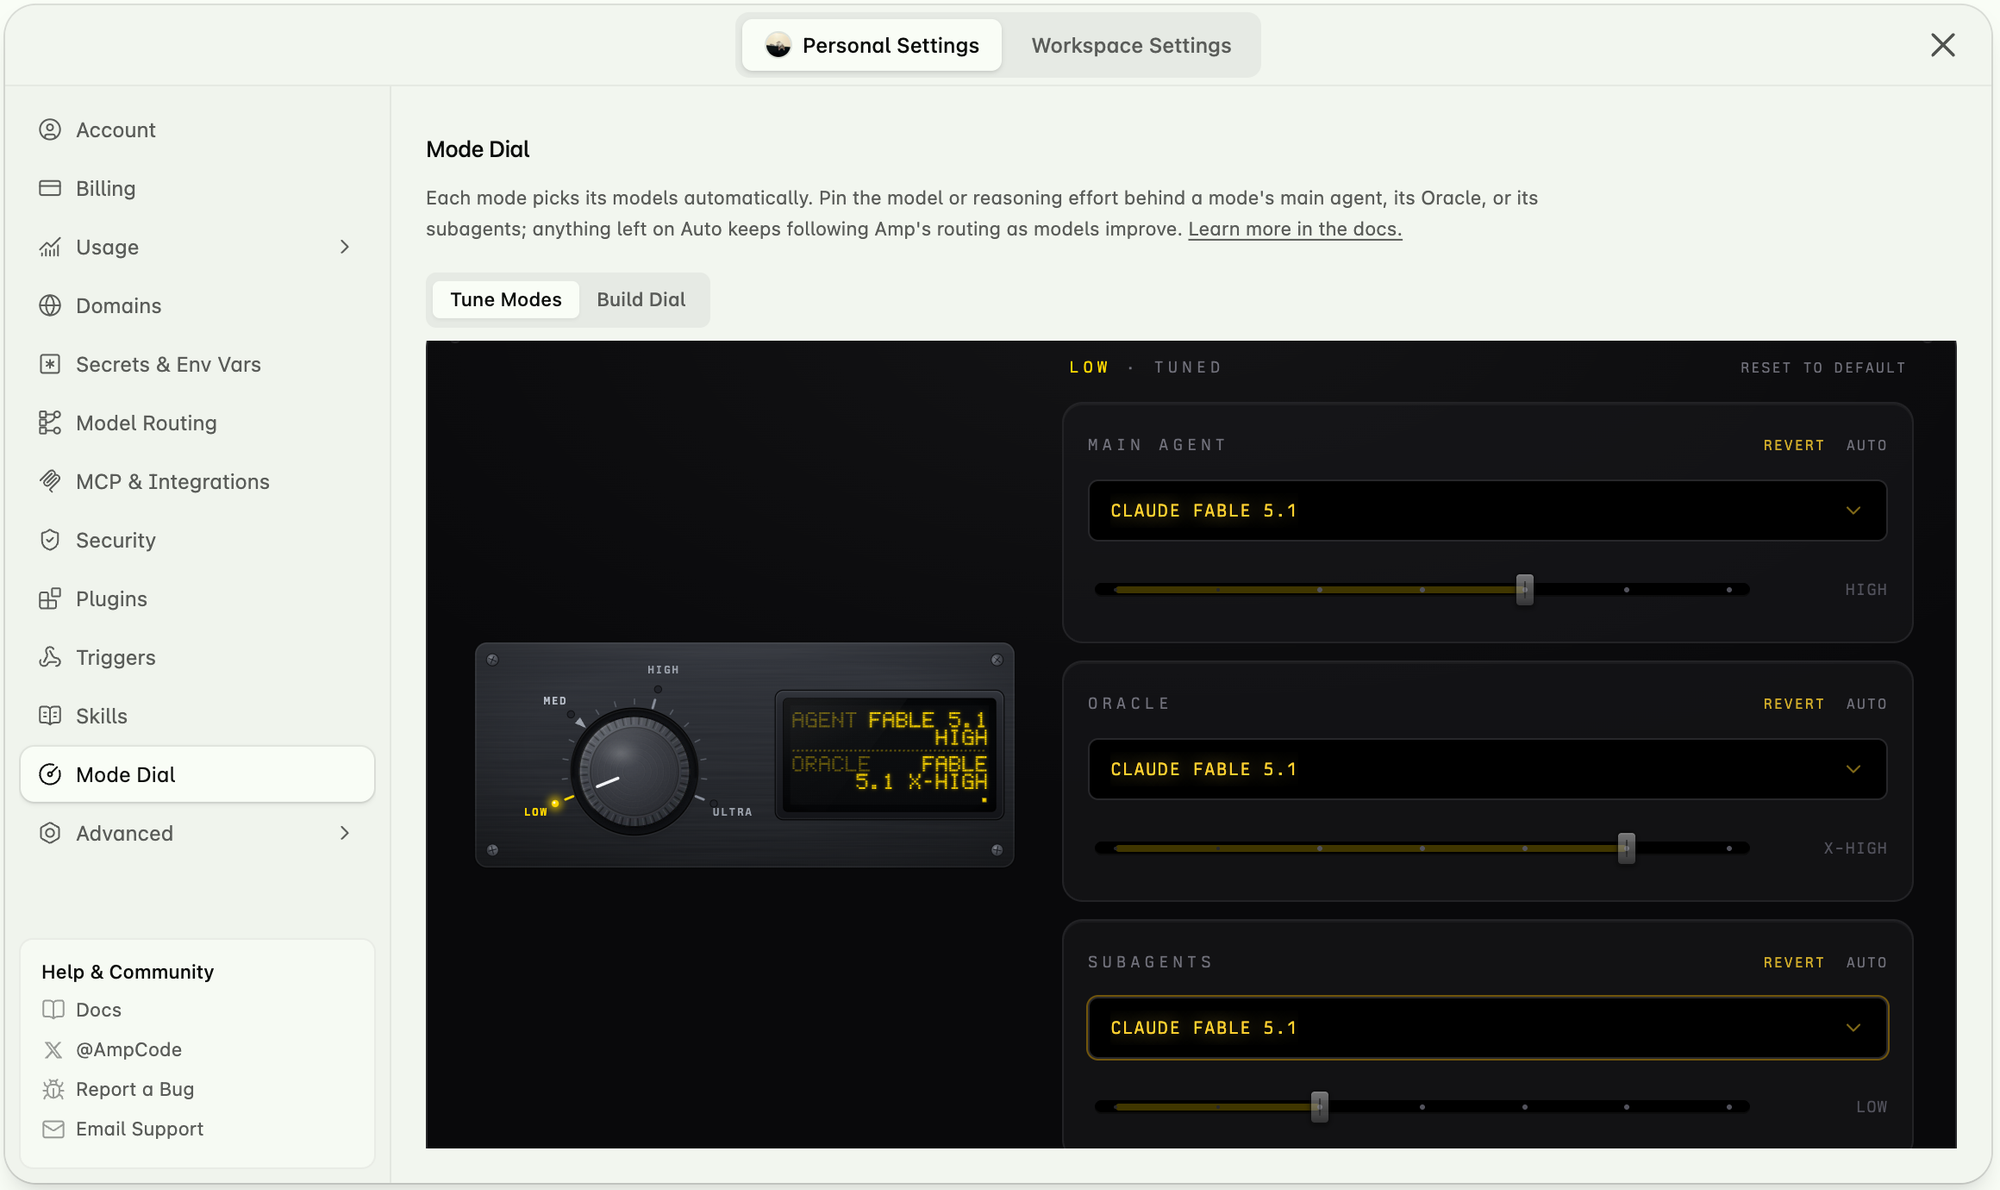
Step 8: Assign a model to each role
Go back to Personal Settings and open Mode Dial. Each mode picks its models automatically; here you can pin a specific model and reasoning effort for a mode's Main Agent, its Oracle, and its Subagents. Anything left on Auto keeps following Amp's own routing.
Step 9: Pick a mode and start the conversation
Click New Thread, choose the mode and model you want, and start chatting or hand Amp a development task.
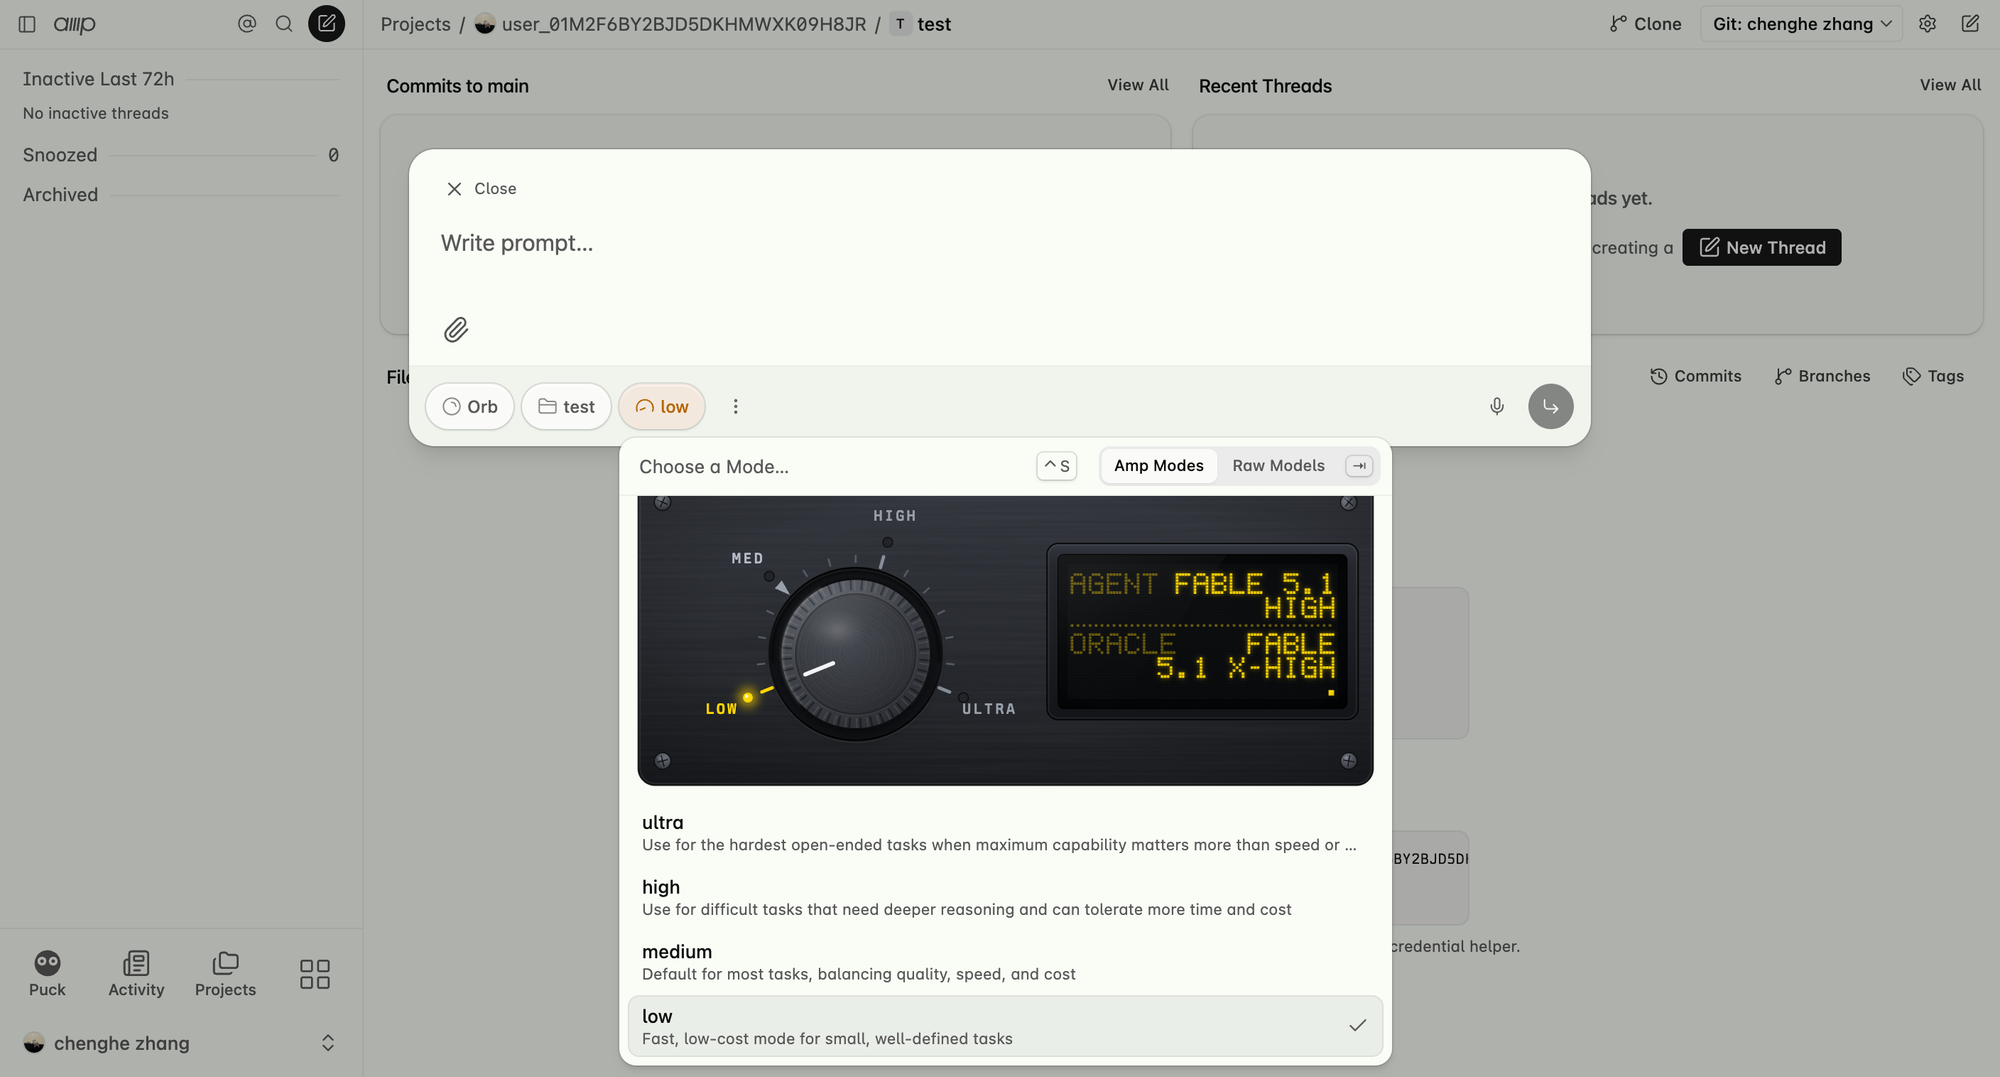
That's the full setup. With one AIHubMix key, Amp can reach Claude, GPT, and every other model on the platform — and you can swap the model behind any mode without touching the rest of your configuration.
- AIHubMix — https://aihubmix.com/
- Amp — https://ampcode.com/